参考:
http://www.cnblogs.com/Braveliu/p/5055387.html
http://zxdflyer.blog.163.com/blog/static/2566426220112319920874/
http://blog.csdn.net/a_sungirl/article/details/8070205
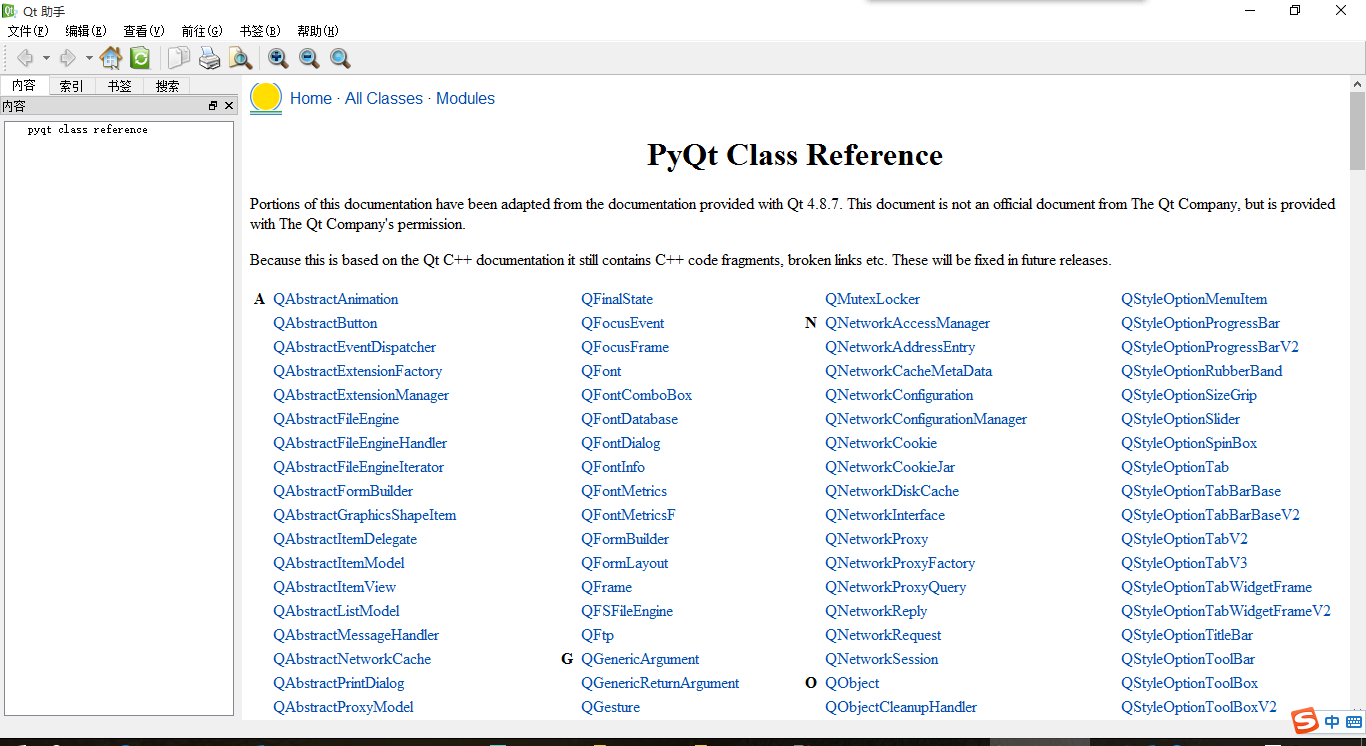
首先看下做出来的效果:
PyQt4默认是没有带帮助文档的,打开Qt Assistant一片空白,那么需要我们自己去压缩帮助文档,默认安装目录(D:\Python27\Lib\site-packages\PyQt4\doc\html)带了一份html格式的文档:
1:制作qhp文件:pyqtclassreference.qhp,文件太长,wordpress不支持发布,故省略,可以从此处下载:链接: http://pan.baidu.com/s/1jI2K4xo 密码: cn3a
<?xml version="1.0" encoding="UTF-8"?>
<QtHelpProject version="1.0">
	<namespace>org.mitk</namespace>
	<virtualFolder>html</virtualFolder>
	<filterSection>
		<toc>
			<section title="pyqt class reference" ref="classes.html">
			</section>
		</toc>
	<files>
			<file>assistant-manual.html</file>
			<file>assistant.qch</file>
			<file>buffer_interface.html</file>
			<file>build_system.html</file>
			<file>classes.html</file>
			<file>dbus.html</file>
			<file>deploy_commercial.html</file>
			<file>designer.html</file>
			<file>genindex.html</file>
			...
			<file>_static\underscore-1.3.1.js</file>
			<file>_static\underscore.js</file>
			<file>_static\up-pressed.png</file>
			<file>_static\up.png</file>
			<file>_static\websupport.js</file>
	</files>
	</filterSection>
</QtHelpProject>
2:通过qhelpgenerator命令进行压缩
qhelpgenerator pyqtclassreference.qhp -o pyqtclassreference.qch
压缩好的文件可以从此处下载:链接: http://pan.baidu.com/s/1kV4ewD5 密码: jbzy
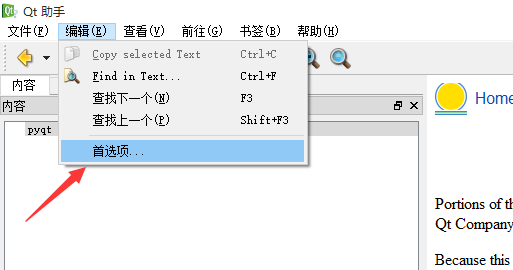
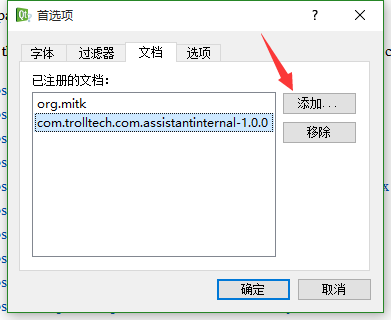
3:最后通过Qt Assistant进行导入即可。
文章的脚注信息由WordPress的wp-posturl插件自动生成


 微信扫一扫,打赏作者吧~
![[整理]how to run flask with pyqt5](http://www.jyguagua.com/wp-content/themes/begin/timthumb.php?src=http://www.jyguagua.com/wp-content/uploads/2021/03/pyqt_flask.png&w=280&h=210&zc=1)
![[已解决]LINK : fatal error LNK1158: cannot run 'rc.exe' 错误的解决办法](http://www.jyguagua.com/wp-content/themes/begin/timthumb.php?src=http://www.jyguagua.com/wp-content/uploads/2021/02/Snipaste_2021-02-17_15-18-26-1024x505.png&w=280&h=210&zc=1)
![[已解决]Python扩展模块 error: Unable to find vcvarsall.bat](http://www.jyguagua.com/wp-content/themes/begin/timthumb.php?src=http://www.jyguagua.com/wp-content/uploads/2020/11/Snipaste_2020-11-19_10-01-38.png&w=280&h=210&zc=1)
![[整理]PyQt画圆,动态变色](http://www.jyguagua.com/wp-content/themes/begin/timthumb.php?src=http://www.jyguagua.com/wp-content/uploads/2020/08/drawCircle.gif&w=280&h=210&zc=1)